Roden Opel Blitzbus Ludewig Aero 1937 Kit 724
Hello. Having built the Roden Opel Blitz bus, and the Opel Strassenzeppelin bus (kits 720 and 725 which also have posts about them on on this blog), I decided to build the Aero variant.
About the bus. Like the Strassenzeppelin, the Aero was built on a standard Blitz chassis, in 1937. It has different body work, and a luxury interior. At least one photo shows one of these buses with WH numberplates and Notek light, photo said to have been taken in Russia. Given the constant requirement for replacement motorised transport during the war, & the strains on the wartime industry to meet the needs of the war, its hardly surprising that existing luxury buses were also sequestered for military service
 About the kit. This kit shares many sprues and parts with other Roden bus kits. The interior seating, wheels and front apron are same as supplied with the Strassenzeppelin. The motor & chassis, as with the Strassenzeppelin are common to the standard blitz bus. In this kit both standard headlights and blackout headlights are supplied, though the instructions advise to use standard headlights. A Notek light is supplied also, being located on the common sprue with all the engine parts, though the instructions also show this as not being used. No decals are supplied. As far as I can see this kit has identical sprues to kit 728, Opel Blitzbus Aero (WWII service) the only difference being that kit 728 will have WH numberplate decals, and the instructions will show to use the blackout lights and Notek light, and different painting instructions.

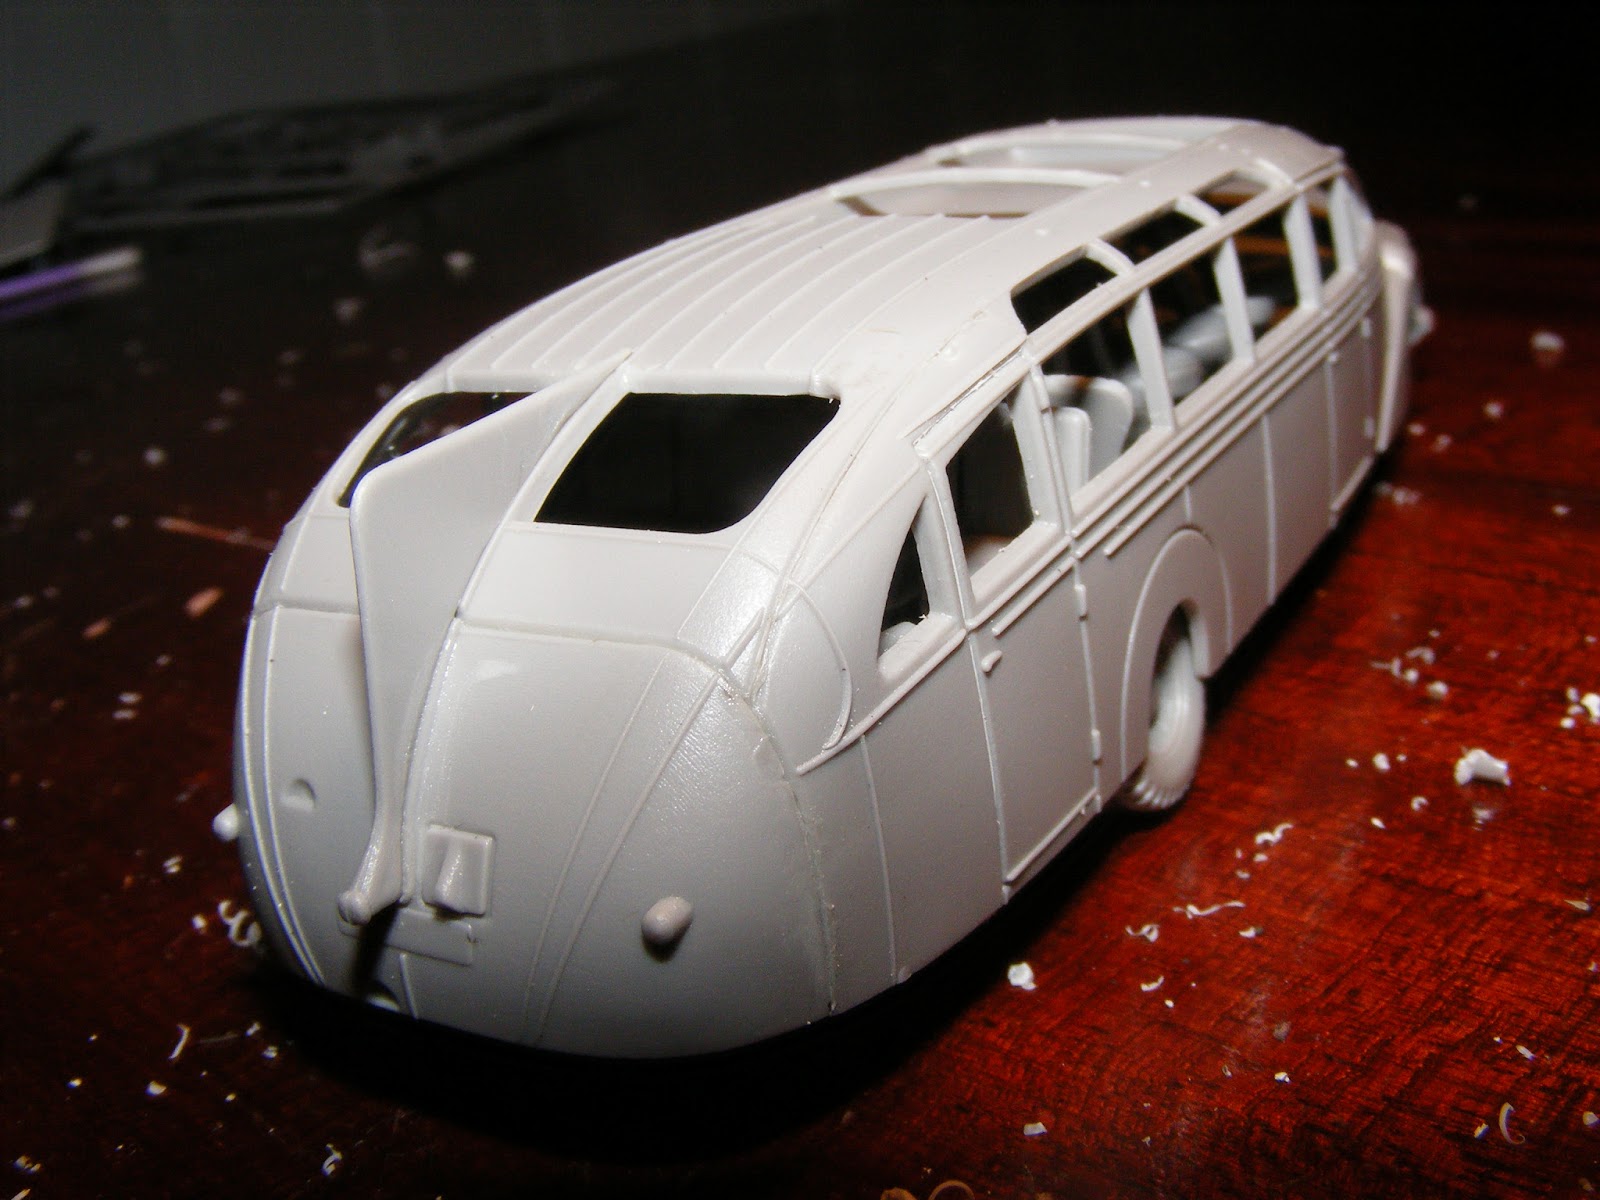
About the build. Having built the chassis twice before on other Roden blitz buses, I decided to go straight for the new parts - roof/cabin, sides, rear end, radiator and 'shark fin to see how they fit. The fit was surprisingly good. Some filler will be needed where the side meets the mudguard, but this will be minimal and has good access to sand to an invisible join.The design of these pieces was so much better, and easier to assemble compared to the multiple pieces that made up the nose on the Strassenzeppelin
 Next job was to see how well the underneath of the chassis fit into the completed bus body shell. I was pleased to find the fit is very good, it fits easily, neither too tight or too loose, in the test fit in the picture below. I found neither of the previous Opel buses I built fit as well as this one.

I found some more time and now the bus is complete, assembly wise, less than 24 hours after being started. I have not glued the chassis and body as these must stay separate for painting and adding of windows.


I have to state this was the easiest assembly of the Roden Opel Blitz buses. Its not simply that I am more used to the assembly as the body assembly on this one is unique - all new pieces, though the chassis is unchanged from the other Blitz Buses. As already mentioned the seating is the same as the Strassenzeppelin. Period photos show the seating really was the same as this, with the seats set at 45 degrees, the rationale being it allowed better viewing out the windows. These vehicles were also said to have a fridge for champagne bottles - though no fridge comes with the kit.
I have only temporarily attached the wheels for these pictures, they also won't get permanently attached until painting is finished. The front axle is very fragile (the same assembly as on the Roden Blitz Truck and Opel Maultier, so it will definitely be put aside until all other painting and assembly is finished.
The glue will be left to harden for a few days, then painting will commence.
TO BE CONTINUED.......................................
Hello. Having built the Roden Opel Blitz bus, and the Opel Strassenzeppelin bus (kits 720 and 725 which also have posts about them on on this blog), I decided to build the Aero variant.
About the bus. Like the Strassenzeppelin, the Aero was built on a standard Blitz chassis, in 1937. It has different body work, and a luxury interior. At least one photo shows one of these buses with WH numberplates and Notek light, photo said to have been taken in Russia. Given the constant requirement for replacement motorised transport during the war, & the strains on the wartime industry to meet the needs of the war, its hardly surprising that existing luxury buses were also sequestered for military service
About the build. Having built the chassis twice before on other Roden blitz buses, I decided to go straight for the new parts - roof/cabin, sides, rear end, radiator and 'shark fin to see how they fit. The fit was surprisingly good. Some filler will be needed where the side meets the mudguard, but this will be minimal and has good access to sand to an invisible join.The design of these pieces was so much better, and easier to assemble compared to the multiple pieces that made up the nose on the Strassenzeppelin
I found some more time and now the bus is complete, assembly wise, less than 24 hours after being started. I have not glued the chassis and body as these must stay separate for painting and adding of windows.
I have to state this was the easiest assembly of the Roden Opel Blitz buses. Its not simply that I am more used to the assembly as the body assembly on this one is unique - all new pieces, though the chassis is unchanged from the other Blitz Buses. As already mentioned the seating is the same as the Strassenzeppelin. Period photos show the seating really was the same as this, with the seats set at 45 degrees, the rationale being it allowed better viewing out the windows. These vehicles were also said to have a fridge for champagne bottles - though no fridge comes with the kit.
I have only temporarily attached the wheels for these pictures, they also won't get permanently attached until painting is finished. The front axle is very fragile (the same assembly as on the Roden Blitz Truck and Opel Maultier, so it will definitely be put aside until all other painting and assembly is finished.
The glue will be left to harden for a few days, then painting will commence.
TO BE CONTINUED.......................................
No comments:
Post a Comment