ACE kit 72285 GAZ-M-415 Pickup truck
After the ACE Opel Olympia, I was in the mood for another small softskin. I've had the ACE GAZ pickup truck in my stash for awhile, so decided to get it underway. These were built prior to WW2, and were for civilian use, & military use. When WW2 began the civilian models were pressed into russian army service. Some fell intact into german hands, and there are period photos of these trucks in german use during the war.
About the kit
The kit contains 3 sprues of polystyrene parts, a small set of etch, a small piece of clear acetate for windows and an instruction sheet. No decals are included. The instructions suggest 3 paint finishes, a pre war white colour scheme for a police vehicle, an early war colour scheme of gloss black for a vehicle impressed into army service, and a middle war colour scheme in green for a vehicle in army service.

The Build
The underneath of the chassis is a straightforward build with no complications, though most parts need a scrape around the edges with a sharp blade to remove cast lines.
The cabin is a bit more problematic. After the edges are scraped the 4 major parts of the cabin and engine area fit reasonably well, but the two parts that make up the bonnet assembly have poorly cast detail around the window area and down the centre of the bonnet. The instructions give a clear idea how this should look, as does the site which has scale plans http://www.smcars.net/forums/gaz/37077-gaz-m-415-pickup-1939-41-a.html.

I had no choice but to sand off the irregularly cast details to smooth, then filled the area & sanded it smooth.
A similar poor join was encountered with the roof and back wall of the cab which also got sanded, filled and sanded again.

Next was a coat of acrylic paint on the roof and bonnet to ensure that my filler and sanding blended perfectly into the plastic

Then using plans (in the link above) as a guide I rebuilt the sanded off details with plastic card and rod cut to shape

Update 27 October 2012. Next the dashboard, steering wheel and column, gear change levers, and seats were fitted, painted and the cab roof and rear were joined to the door and bonnet assembly. The windscreen will be fitted before the cab is affixed to the chassis. The door frames were scribed to make them deeper as the cast of these lines is quite light, and the brass louvred engine panels were affixed. Then a light spray of diluted Tamiya enamel XF-1 was applied over most of the parts, as a kind of pre shading.

A couple of hours later I sprayed a base coat of diluted Humbrol enamel, Matt 226 trying to give a lighter coat to the areas that naturally fall in shade and a heavier coat on the areas that are usually exposed to natural light, primarily being the flat or horizontal surfaces.


Update 01 November 2012. I have now test fitted the wheels to make sure all is even, added quarter windows to the cab doors, and a window to the rear cab wall. I have also made brass rails for the tray, as these will always look better than plastic. Vehicle has a partial wash of Citadel Badab Black to darken some areas. Painting is not complete yet. And still need to add headlights, front window, window wiper and other small details to the front and rear.

Update 04 November 2012. I have now fitted the headlights and rear and front numberplates. Odd that the kits doesn't supply and decals to put on the numberplates so I painted them brown for now. The lower surfaces and areas have all been lightly sprayed with diluted Model Master 'Italian Sand' enamel paint to look a little dirty.
For the windscreen surround I used an etch window frame from the GAZ M-1 Emka that was kindly sent to me by Ilian Filipov. This makes the front window area much neater. I cut out the acetate clear window outline supplied in the kit and its a perfectly neat fit within the etch frame. I used a tiny amount of liquid super glue in each corner, applied with the point of a toothpick, to hold it in place. I then masked off the area that the window wiper would clear and sprayed light dust (again the 'Italian Sand' enamel paint over the rest of the window to make it look dirty. The kit does come with an etch window wiper which requires the drilling of a tiny hole above the window frame, to allow it to be attached. Just one window wiper as per an 'austerity' war time economy.
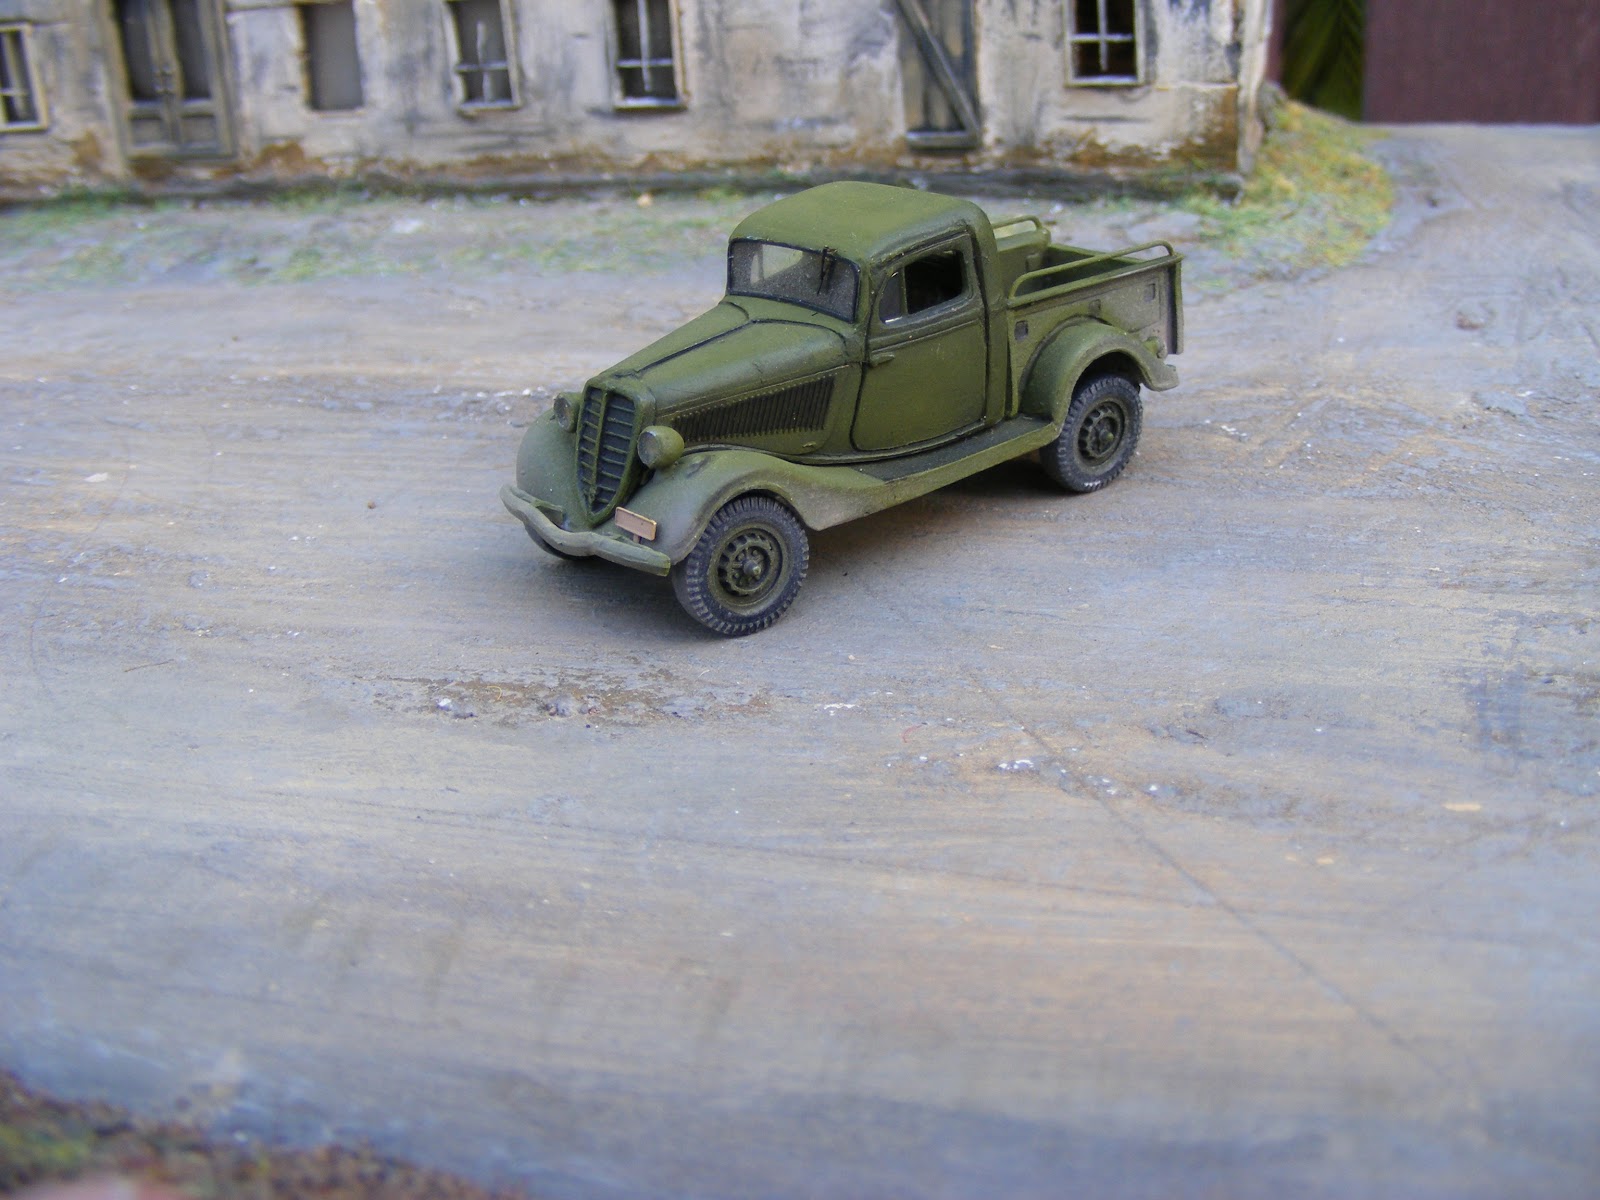
Conclusion. This kit makes into a very nice looking small truck. The poor moulding on the bonnet near the front window was a drawback,otherwise this would have been a neat 'Out of the Box build'. As per my build log, it wasn't very hard to tidy it up with some evergreen card and fine rod.. I'd suggest that an etch window frame is also almost a must on this vehicle, and the absence of number plate decals is odd. There are plenty of photos on the web of this vehicles in war time and pre and post war use, which also helps with the build. Pictures below.


After the ACE Opel Olympia, I was in the mood for another small softskin. I've had the ACE GAZ pickup truck in my stash for awhile, so decided to get it underway. These were built prior to WW2, and were for civilian use, & military use. When WW2 began the civilian models were pressed into russian army service. Some fell intact into german hands, and there are period photos of these trucks in german use during the war.
About the kit
The kit contains 3 sprues of polystyrene parts, a small set of etch, a small piece of clear acetate for windows and an instruction sheet. No decals are included. The instructions suggest 3 paint finishes, a pre war white colour scheme for a police vehicle, an early war colour scheme of gloss black for a vehicle impressed into army service, and a middle war colour scheme in green for a vehicle in army service.

The Build
The underneath of the chassis is a straightforward build with no complications, though most parts need a scrape around the edges with a sharp blade to remove cast lines.
The cabin is a bit more problematic. After the edges are scraped the 4 major parts of the cabin and engine area fit reasonably well, but the two parts that make up the bonnet assembly have poorly cast detail around the window area and down the centre of the bonnet. The instructions give a clear idea how this should look, as does the site which has scale plans http://www.smcars.net/forums/gaz/37077-gaz-m-415-pickup-1939-41-a.html.

I had no choice but to sand off the irregularly cast details to smooth, then filled the area & sanded it smooth.
A similar poor join was encountered with the roof and back wall of the cab which also got sanded, filled and sanded again.

Next was a coat of acrylic paint on the roof and bonnet to ensure that my filler and sanding blended perfectly into the plastic

Then using plans (in the link above) as a guide I rebuilt the sanded off details with plastic card and rod cut to shape

Update 27 October 2012. Next the dashboard, steering wheel and column, gear change levers, and seats were fitted, painted and the cab roof and rear were joined to the door and bonnet assembly. The windscreen will be fitted before the cab is affixed to the chassis. The door frames were scribed to make them deeper as the cast of these lines is quite light, and the brass louvred engine panels were affixed. Then a light spray of diluted Tamiya enamel XF-1 was applied over most of the parts, as a kind of pre shading.

A couple of hours later I sprayed a base coat of diluted Humbrol enamel, Matt 226 trying to give a lighter coat to the areas that naturally fall in shade and a heavier coat on the areas that are usually exposed to natural light, primarily being the flat or horizontal surfaces.


Update 01 November 2012. I have now test fitted the wheels to make sure all is even, added quarter windows to the cab doors, and a window to the rear cab wall. I have also made brass rails for the tray, as these will always look better than plastic. Vehicle has a partial wash of Citadel Badab Black to darken some areas. Painting is not complete yet. And still need to add headlights, front window, window wiper and other small details to the front and rear.
Update 04 November 2012. I have now fitted the headlights and rear and front numberplates. Odd that the kits doesn't supply and decals to put on the numberplates so I painted them brown for now. The lower surfaces and areas have all been lightly sprayed with diluted Model Master 'Italian Sand' enamel paint to look a little dirty.
For the windscreen surround I used an etch window frame from the GAZ M-1 Emka that was kindly sent to me by Ilian Filipov. This makes the front window area much neater. I cut out the acetate clear window outline supplied in the kit and its a perfectly neat fit within the etch frame. I used a tiny amount of liquid super glue in each corner, applied with the point of a toothpick, to hold it in place. I then masked off the area that the window wiper would clear and sprayed light dust (again the 'Italian Sand' enamel paint over the rest of the window to make it look dirty. The kit does come with an etch window wiper which requires the drilling of a tiny hole above the window frame, to allow it to be attached. Just one window wiper as per an 'austerity' war time economy.
Conclusion. This kit makes into a very nice looking small truck. The poor moulding on the bonnet near the front window was a drawback,otherwise this would have been a neat 'Out of the Box build'. As per my build log, it wasn't very hard to tidy it up with some evergreen card and fine rod.. I'd suggest that an etch window frame is also almost a must on this vehicle, and the absence of number plate decals is odd. There are plenty of photos on the web of this vehicles in war time and pre and post war use, which also helps with the build. Pictures below.