UMMT Kit 616 Armoured Defense (PVO) railroad car by 'Steel Bridge' plant.
Time to start a new build that will be useful on a new diorama that is in the planning stages. This kit fits the bill as the diorama will include a railway line or two.
The russians mounted every type of anti aircraft weapon from Maxims to 85mm AA cannon on railway wagons, in various armoured, semi armoured and unarmoured formats. I have been unable to locate any period photos of this exact type of railroad car. I have found one picture of a very similar wagon, except the wooden sides also have armour plate added to protect the railway wagon. A period builder's drawing shows armoured boxes that look the same as provided in this kit, in use on other railway wagons as well. These kits are made in the Ukraine, they possibly have more local reference material to base the build upon. The kit makes mention that 21 of these wagons were built, and that later models had armour on the wagon chassis and that25 and 37mm AA guns mounted inside the armoured boxes. I have found photos of these later types with the larger calibre AA guns, though not based on these small 4 wheeled wagons.
The kit. In the box are 3 sprues of plastic parts & 3 sets of etch to make up the wagon, and 2 small sprues of plastic parts & 2 small sets of etch to make up the 12.7mm machine guns. 2 pieces of wire are also included as well as fairly well detailed instructions. No decals included, it appears these wagons were unmarked.
This kit is basically UMMT kit 614 (6.6 metre 20 tonne platform wagon), with the addition of parts to make 2 x armoured boxes and 2 x 12.7mm DShK heavy machineguns.
Assembly of the wagon is quite straightforward . There is a need to fold some long slender etch pieces into 'L' and 'U' shapes for the wagon underframe, which is a bit difficult to do without a bending tool, but I managed with metal rulers to get the bends shaped with a satisfactory degree of neatness. I use liquid CA glue to affix these and all etch parts to plastic.
Though underside detail is incomplete, regarding the air braking system, what is missing would not be visible when the wagon is on the track anyway. What can be seen, which are the wheels, brake gear, leaf springs, & axle boxes are all very nicely detailed, with realistically shallow flanges on the wheels. This wagon is modelled in russian broad gauge, which is much wider than what was, and is in use in most of Europe.


The armoured boxes. These look to be accurately shaped, with similar hinges, compared to the few reference sources, but they are not perfectly cast. The rivet heads on the hinges are slightly off centre, and the joins need filler. The inside edge needs sanding and scraping to get an even shape to the interior.

The DShK 12.7mm guns. There are just 2 plastic and 3 etch pieces for each gun. They are hinged so the guns can elevate up and down, and with a small amount of work can be made to turn 360 degrees. The barrels will also need drilling out.


Update 29 August 2012. The rest of the brass etch has been cut out, folded, and fixed with CA glue. This consists of the hinges on 2 sides of each 'armoured box'. Why half the hinges are moulded on and why half are supplied as etch is a mystery to me. I also affixed the small triangular shaped pieces that evidently are in place to support the top of the armoured boxes when they are hinged open. The inward angled plates could be folded out, to allow the gunners and air spotters better views and more room in which to operate the gun. The triangular 'stoppers' could also be used for anchor points for a canvas cover over the armoured box in winter weather, or even to affix camouflage nets or camouflage materials to.
I have also affixed the support rods to the wagon base (0.15 piano wire) as the brass wire supplied in the kit is a bit bent, and these support beams need to be straight, also all other parts have been affixed to the wagon except for the couplers at either end, as these need work to make them look more realistic, being mainly etch, they are too flat to represent the 'U' shaped metal rings that make up the coupler links.
2 pieces of rail track are supplied in this kit, which is good, usually 2 pieces are only supplied for longer vehicles. The track is the standard UMMT track supplied with all UMMT kits, which is scaled to russian broad gauge. Detail is not too bad, and size and spacing of the sleepers (or ties) is consistent with wartime photographs of russian railways.
The buffer faces at each end of the wagon also need improvement, being etch they are too thin and flat.
When all is tidied up, I will get an undercoat on this wagon


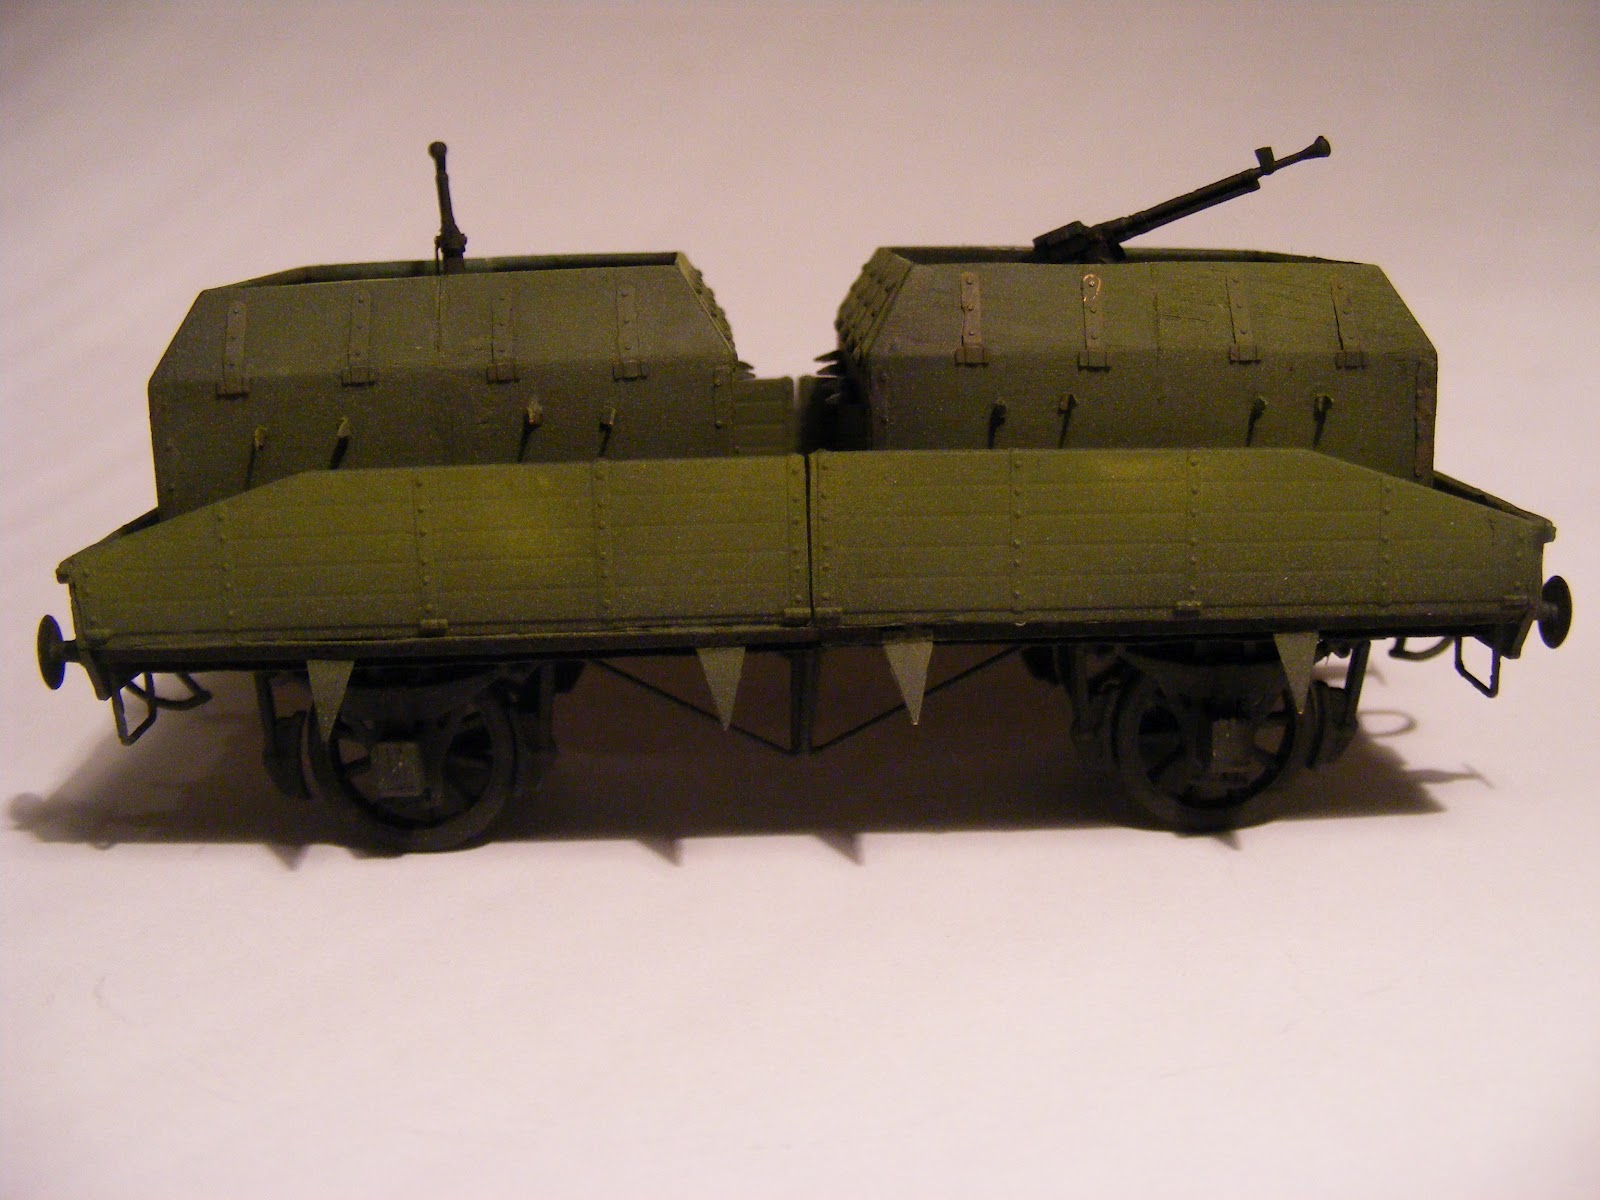
Update 02 September 2012. The paintjob on the wagon has commenced. The box art shows these were painted in standard army green. I have been advised that russian railway wagons were also painted red bown. I decided to stay with the green.
First up the wagon was spayed completely with Tamiya flat black enamel, this was allowed to dry for 24 hours. Then the sides of the wagon were sprayed with Revell Matt Enamel Green 79, immediately followed by a light overspary with Humbrol Matt Enamel Green 226. The second, lighter coat of green was applied mostly to the upper parts of the sides. The metal boxes that contain the guns received the same paint treatment.
Still need to do washes and further painting to the boxes, as well as some highlights and dust, particularly to the lower areas. The wagon buffers also need to be improved, as does the couplers, and the MGs need their barrels to be drilled out, and painted.

Update Sunday 21 October. The metal hinges and armoured protection and other ferrous parts have had a light coat of diluted Lifecolor acrylic with a brush, RAL 8002 (Signalbraun) as the shade looks to me like a light layer of rust. Then an overall wash with Citadel Badab Black, lightly diluted. The wagon under parts were given a light spray with very diluted light grey enamel (Humbrol Matt 1) to lighten it up a bit.
This vehicle still not finished, still need to work up the paint job a bit more, add couplers, imrove the buffers and maybe add some decals.
Bottom picture shows that the cast on hinges for the armoured boxes have slightly off centre bolts. I could cut these off and make new ones, maybe at a later time. The plug marks inside the box can be seen by the light of the flash. Without a flash the interior is dark, and these marks are hard to see. I will improve these, the boxes are not fixed to the wagon yet.


TO BE CONTINUED.....
Did it come with a length of track to sit it on? if not, where would you source the track? may have to scratch build it? good so far.
ReplyDeleteHi Dan, yes it comes with track, I will include a picture next update, cheers, Neil
ReplyDelete