Sunday, June 30, 2013

ACE kit 72237 Kfz 14 Radio Car Fu Kraftwagen

ACE kit 72237 Kfz 14 Radio Car Fu Kraftwagen

Hello small scale fans

I bought this kit years ago, soon after it was released, and it has sat untouched ever since it arrived. Having recently built the S Models Kfz 13, I decided to dust off the box and get this one underway also, for interest and comparison.

The Kfz 14. This vehicle is virtually identical to the Kfz 13. Difference being that the pedestal mounted MG was removed, and a radio was installed, with a large frame aerial, and radio operators chair.

The Kit. The box contains 3 sprues of plastic parts, 1 sheet of decals, 1 set of instructions.


Assembly. As seems standard with ACE, assembly begins with the underchassis - axles, wheels, suspension and drive train. Most of these parts have a fairly pronounced seam line, similar to whats found on other ACE kits with chassis, so some cleanup with a knife blade required. I found the rear axle springs needed a small piece of evergreen rod (about 1.5mm) added to where they join the chassis frame. This is to ensure the vehicle sits level, and does not sit low in the rear.


The front and rear mudguards are quite thick in profile. I slimmed these down by careful scraping of the inside edge with a sharp blade, and then ensured the smooth inner curve was retained by careful sanding with some fine paper. This improved the fit of the wheels inside the mudguards and the appearance of the mudguards. I also slimmed down the edges of the panels that make up the top edge of the cabin, to improve the appearance when looking down into the vehicle.

I had to trim the floor base slightly to ensure the body panels fit correctly, the floor base is a little too wide.

The actual fit of the body panels is quite good - better than most ACE kits. A tiny bit of filler and sanding was needed where the sides met the front drivers panel and the rear panel, though the rear panel joins are almost obscured by the spare wheel anyway.


The kit comes with the turn indicators, rear storage boxes, dashboard with details, and exhaust assembly & tread plate moulded into cabin floor - all pieces that don't come with the S Model Kfz 13 kit.

Omissions. The 4 support legs for the aerial are supplied, and the modeller is advised to make an aerial from 1mm wire (not supplied). Also no front width markers or rear view mirror is supplied - the instructions advise to use pins to make the markers.

I made the aerial from Evergreen 0.5 mm rod bent with tweezers into a rectangle shape then glued, then affixed to the support arms (which were first attached to the vehicle). I'd suggest that 1.0mm would look a little too heavy for the aerial. I added a single strand of thin copper wire from the aerial to the radio. The wire strand was taken from a multi strand copper cable from an old broken TV set.

If you decide to skip the aerial, the pedestal machine gun is included on the sprues, so the vehicle can be assembled as a Kfz 13.

I made width markers and rear view mirror support from stretched sprue with a ball atop each one sourced from a Brita Water Filter. Each filter contains thousands of tiny balls of varying diameters - perfect for Braille Scale projects. The round mirror was made from a thin slice of evergreen rod, the hole filled with Testors Window Maker which also holds the mirror to its rod.

The internal grab rail across the front was made with 0.50mm rod curved and glued in place.

Wheel hub stubs were supplied in the kit. I chose to use Evergreen rod as I found it easier and a bit tidier looking.


Below picture shows Kfz 14 at left with S Models Kfz 13s.


TO BE CONTINUED.................


Saturday, June 29, 2013

S-Model kit PS720013. Maschinengewehrkraftwagen Kfz-13

S-Model kit PS720013. Maschinengewehrkraftwagen Kfz-13

Hello. I have been absent from the blog for a while. I have been away, and then caught a stomach bug which took a week to get over, and now with very cold weather have caught the flu, which has slowed me down a lot.  I should be feeling much better soon.

I had no intention to add a Kfz-13 to my pile of unbuilt vehicles, however I was in my local hobby shop which had stocked up on S-Models kits, so I decided to give the Kfz 13 a go. I tend to prefer mid to late war vehicles, and am building a large diorama which is in the mid to late period so wasn't too sure what I'd do with this kit.

The Kfz-13. On getting home I decided to do some quick research on the web. Though most period photos show Kfz-13s in early war service in Poland in 1939 or France in 1940, one picture was found which displayed a Kfz-13 in May 1945 surrendering to US Forces in Bohemia. And it was obvious it had been modified. I determined on the spot to make one Kfz-13 as standard, and the other as the modified type in the 1945 photo. This conversion has been done by a blogger site named 'Dieselwerk' , the modeller has done fine work on the conversion in 1/35 scale.I will attempt to do fine work in 1/72 scale.

The kit. As per other S-Models kits, parts for 2 complete Kfz-13s are in the box. Which includes 2 sprues of dark grey plastic, two sets of brass etch parts, one decal sheet and one coloured instruction sheet.


The Parts. All parts were sharply cast, with virtually no flash. Some very minor seam lines on some parts were easily dealt with via a scrape with an exacto blade. The sides of these vehicles were built up with quite soft angles. The joins between the angles on the kit are quite soft, maybe a little softer than in reality. Probably better to be a little softer on the angles than too pronounced with a kit this size - its a very small vehicle. Injector marks exist on the underneath of the floor. As these won't be seen I don't care about them, though some may choose to fill them.

One casting flaw existed on both sprues. The axles and drive train are cast as one part, which is a good idea, which reduces trying to get tiny pieces correctly aligned. However the tail shaft which connects from the back of the gearbox to the rear axle differential had a small section missing. As flaws go this is not a big one - very easy to cut off the miscast drive shaft and replace it with stretched sprue, evergreen rod, or brass rod.


Assembly. Everything went together very easily. No filler or sanding needed. The wheels press on and can be rotated, though the axle assembly is quite delicate and will not bear much pressure, so rotating the wheels is not recommended.

The width indicators for the front mudguards and the rear vision mirror stalk are etch. I don't like these as they are made flat, and very 2 dimensional. In reality these are rounded rods that are very 3 dimensional looking. I made my own width indicators and rear mirror stalk from stretched sprue, drilling small holes in the mudguard to insert them into and glue. The round balls on top of the stalks are water filter balls, removed from a Brita water filter & attached with CA glue. The round mirror was cut from the etch stalk and attached to the stretched sprue stalk with CA glue.

The headlights have miniscule ledges on the front guards on which to affix them, tweezers and care needed to affix these correctly.


Omissions.

No dashboard is included. The cab facing back of the firewall is somewhat dashboard shaped, but has no detail.

Large storage box should be affixed each side to the 2 rear panels, but none come in the kit. Period photos almost always show these affixed. I supplied some the right size and shape from the spares box.

 No exhaust pipe and muffler is supplied for the underside. This was easy to fashion from some Evergreen rod for the muffler and wire bent to shape for the exhaust system.


No turn indicators are supplied. Period photos almost always show these were affixed to the sides just forward of the side doors. I made some from Evergreen rod.


I also added a storage box (from the spares box) to the driver's side of the body. Period photos show sometimes non standard boxes were fitted to either side.  

 Not sure about the reality, but the cab floor is cast smooth - not sure what the real ones had, but if no metal tread plate, possible wooden treads would have been installed, as seen on some other early war vehicles.

Other comments. This kit builds into a very attractive model of a Kfz-13 . I compared the length, width and height advised in "The Encyclopaedia of German Tanks of World War Two" (despite the title it has details for far more than just tanks) to the actual measurements of the model, and conclude that height and width are extremely close to being 1/72 scale (within fractions of a millimetre). The length is marginally over scale (by less than a millimetre). 

The 1945 photo. Only one photo exists, a still from a moving picture, and from this we can't conclude everything. What is certain is that the sides were raised up right around the open cabin area. The photo shows this clearly, as the sides and front extend above the front vision visor, which on a standard Kfz-13 is about even with the top of the cabin area. What else seems to be apparent is that a roof has been built over the open cabin. Men are seen sitting on the roof, while others are emerging from the roof, seemingly sitting up through open hatches. Similar conversions to this have been photographed on at least one Sd Kfz 250 in the mid war period.

What can't be known is the exact roof appearance as its obscured in the photo. Whether this was a one off or whether others existed is not known. When the conversion was done is not known. Very likely this is a field modification to provide extra protection of the crew from severe weather conditions and for added protection in combat conditions, should this vehicle be unfortunate enough to be caught in combat. That this vehicle survived to the end of the war suggests it was not a 'combat' vehicle, but probably a HQ or rear echelon liaison vehicle, or transport runabout, pressed into service sue to the ever increasing shortage of motorised vehicles as the war progressed.

A blog called "DIESELWERK" shows a 1/35 scale modification, which I used as inspiration. I chose a different hatch configuration on my build.

I built this kit as per the standard Kfz-13 with the same improvements, but omitted the MG due to the roof. The roof was plastic card, the hatches were from the spares box. Only other difference is the addition of an aerial mount on one side, as the intention is that this is a command liaison vehicle. Notek light was added as per period photo.


An overall coat of Humbrol rattle can primer to help identify any needs for sanding or filler


Update Sunday 30 June.

The primer revealed some tidy up needed on the 1945 version. Some sanding was done to all the added panels, and was then reprimed, result below.

Below pictures also include ACE's Kfz 14 for comparison. I will write a separate review on the ACE kit soon.


TO BE CONTINUED....................


Tuesday, May 7, 2013

Roden Blitz Omni Bus Stabswagen Opel 3.6-47 kit 723

Roden Blitz Omni Bus Stabswagen Opel 3.6-47 kit 723

Having put the Blitz Aero together in a day, and having enjoyed it so much, I decided it was time to build another bus. I will refer to this one as a Staff Bus, as the kit title is rather a mouthful.

About the bus. According to the information with kit these were used in all theatres of operation. It was in effect a kind of mobile office or command centre. Pictures, plans and information about all the Opel Bus types can be found on Piet Van Hees very useful site http://www.pietvanhees.nl/blitzbus/

About the kit. This kit shares many sprues with the Roden Opel Blitz W39 bus. Chassis is identical. Body is identical. The main difference is the inside furnishings which consist of tables, shelves benches, a radio, enigma machine (or perhaps its a typewriter). This version also has additional wooden decking on the roof, and etched roof racks, much longer than that which the standard bus was fitted with.Etch covers for the side windows are also supplied.


About the build. As this kit has so much interesting internal detail, I decided to open both the front side doors, and the large rear door, cutting these out carefully with a fresh exacto blade. Despite this not much of the interior will be visible, but it will make the vehicle look much more interesting. I was going to thin down the cut out doors, but period photos show the doors were quite thick. Unlike a tank hatch which is solid metal and comparatively thin, the doors on these vehicles had an outer and inner covering, being essentially hollow in the middle, so were quite thick.

Below are test fits of the floor/chassis to the body, so far all are good fits.


Update Saturday 11 May. I have to admit this is a very enjoyable build. I decided it would be easy enough to build this one so that the body can be removed to show the interior detail, so decided to improve the interior a bit. I won't be going crazy on interior detail, just some improvements. I started with the floor.

 Period photos show that wooden slats of a pallet like construction were laid over the much of the floor of these buses. Wood was plentiful, and  timber slats would have been cheap to manufacture and to fit, and add very little to the weight of the bus. Non slip metal tread plate would add to the weight of the bus and be more expensive. Rubber mats would have been in short supply and would wear out quickly in rough conditions on operations. The timber slats would have been assembled in sections and would have been removable when needed for cleaning and maintenance. The wood slats would have dealt well with wet and muddy conditions, the water and mud being trapped in the gaps between the slats.

First job was to fill the holes where the seats would go (the floor in the kit is same as the standard Opel bus) I used 0.010" x 0.020" & 0.020" x 0.020" evergreen strip styrene (Item 100 & 120) glued to the floor. Not a hard job, but took an evening while watching/listening to TV to provide some distraction for the mind while working on what is otherwise a slightly boring task.


I also decided to not use the etched roof rack. It looks reasonably OK, though a bit too flat for my taste.
I built a roof rack out of 0.020" Evergreen Rod (Item 218). I drilled holes in the roof for the supports, and simply cut the lengths to fit and glued them. Not hard but requires accurate measuring and cutting and is quite time intensive, it took a few hours. To get curves I simply rolled the rod around items of varying diameters to get tighter or larger curves as required. Items such as pens, screwdriver shafts etc. The rod is quite thin which makes it quite flexible and very adaptable to being curved.


TO BE CONTINUED....................................

Monday, May 6, 2013

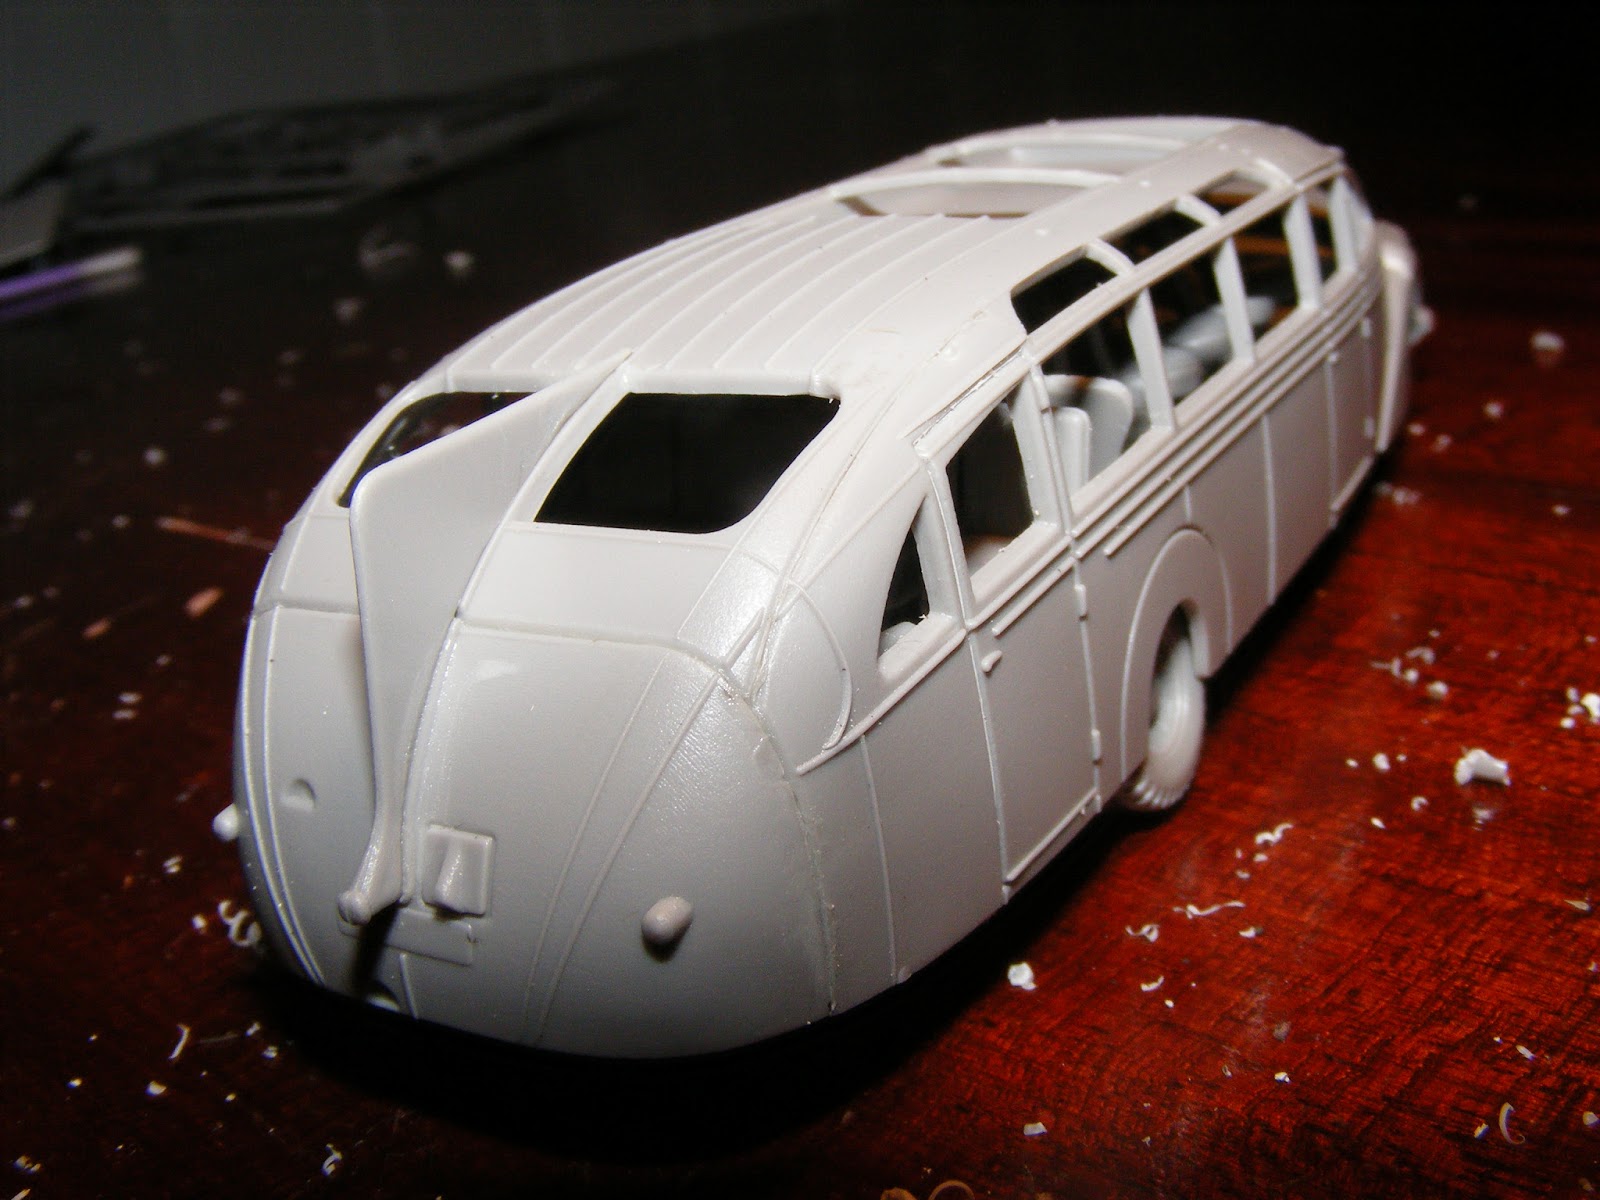
Roden Opel Blitzbus Ludewig Aero 1937 Kit 724

Roden Opel Blitzbus Ludewig Aero 1937 Kit 724

Hello. Having built the Roden Opel Blitz bus, and the Opel Strassenzeppelin bus (kits 720 and 725 which also have posts about them on on this blog), I decided to build the Aero variant.

About the bus. Like the Strassenzeppelin, the Aero was built on a standard Blitz chassis, in 1937. It has different body work, and a luxury interior. At least one photo shows one of these buses with WH numberplates and Notek light, photo said to have been taken in Russia. Given the constant requirement for  replacement motorised transport during the war, & the strains on the wartime industry to meet the needs of the war, its hardly surprising that existing luxury buses were also sequestered for military service

About the kit. This kit shares many sprues and parts with other Roden bus kits. The interior seating, wheels and front apron are same as supplied with the Strassenzeppelin. The motor &  chassis, as with the Strassenzeppelin are common to the standard blitz bus. In this kit both standard headlights and blackout headlights are supplied, though the instructions advise to use standard headlights. A Notek light is supplied also, being located on the common sprue with all the engine parts, though the instructions also show this as not being used. No decals are supplied. As far as I can see this kit has identical sprues to kit 728, Opel Blitzbus Aero (WWII service) the only difference being that kit 728 will have WH numberplate decals, and the instructions will show to use the blackout lights and Notek light, and different painting instructions.


About the build. Having built the chassis twice before on other Roden blitz buses, I decided to go straight for the new parts - roof/cabin, sides, rear end, radiator and 'shark fin to see how they fit. The fit was surprisingly good. Some filler will be needed where the side meets the mudguard, but this will be minimal and has good access to sand to an invisible join.The design of these pieces  was so much better, and easier to assemble compared to the multiple pieces that made up the nose on the Strassenzeppelin

 Next job was to see how well the underneath of the chassis fit into the completed bus body shell. I was pleased to find the fit is very good, it fits easily, neither too tight or too loose, in the test fit in the picture below. I found neither of the previous Opel buses I built fit as well as this one.

I found some more time and now the bus is complete, assembly wise, less than 24 hours after being started.  I have not glued the chassis and body as these must stay separate for painting and adding of windows.


 I have to state this was the easiest assembly of the Roden Opel Blitz buses. Its not simply that I am more used to the assembly as the body assembly on this one is unique - all new pieces, though the chassis is unchanged from the other Blitz Buses. As already mentioned the seating is the same as the Strassenzeppelin. Period photos show the seating really was the same as this, with the seats set at 45 degrees, the rationale being it allowed better viewing out the windows. These vehicles were also said to have a fridge for champagne bottles - though no fridge comes with the kit.

I have only temporarily attached the wheels for these pictures, they also won't get permanently attached until painting is finished. The front axle is very fragile (the same assembly as on the Roden Blitz Truck and Opel Maultier, so it will definitely be put aside until all other painting and assembly is finished.
The glue will be left to harden for a few days, then painting will commence.

TO BE CONTINUED.......................................

Saturday, May 4, 2013

Hobbyboss German Rail Transporter for Karl Gerat Kit 82906

Hobbyboss German Rail Transporter for Karl Gerat Kit 82906

Sunday 5 May 2013.

About this post. I commenced this build a couple of weeks ago and took a number of "in progress" pictures. Unfortunately the storage device the pictures were on became corrupted and I lost them all, so I only have pictures of the  major pieces assembled.

The kit. This contains 7 sprues of plastic parts, 1 set of decals, painting guide and instructions. These can be viewed on Henk of Holland's site. All parts are neatly and crisply cast, with very little flash.

The Build. The build was quite straightforward and easy, aided by excellent instructions. Two issues need to be mentioned.

The first is minor. Some of the wheel hubs that the axles fit into needed a small amount of enlargement. This was easy to scrape out with a knife, and the wheel sets fit better as a result. This was only one or two hubs on each bogie the rest were fine.

The second issue is not so minor. The outside of the bogies (parts B7 x 2 and B8 x 2) have large injector marks. Some were slightly raised some were slightly sunk in. All were hard to deal with as their is a lot of detail very close to the injector circles. Fortunately these repairs are largely covered by additional parts that are fit to the bogies. There were 11 injector marks per piece, so in all 44 to fix on the bogies. It didn't take too long to fix, but it would seem this was a crazy way to cast these pieces - if these injector marks were on the other side they would be completely unseen. The exact same problem was also on parts B5 x 2 and B11 x 2, which are the long side parts of the large overhead frames that hold up the Karl. Unlike the bogies, the areas the injector marks are on will not be covered by other detail, so a lot more care is needed in dealing with them. Again there were 11 injector marks per part, 44 in total If the injection had been set up to occur on the other sides of the parts they would be near invisible, except on very close inspection.


 The transporter was sprayed with Hobbyboss acrylic black, then a spray of H337 "Grayish-Blue", leaving the areas that would be in shade with a lighter coating, to create some modulation, depth and contrast between the different surfaces and angles. Still a lot of painting to do, better pictures will be taken and posted.

The model is  not properly assembled yet, some 'Blu tack" is holding the frame assemblies up. Final assembly will occur when painting is finished,


Update 16 July 2013. The components have had a light spray of Aqueous Hobby Color, Sand Gelb, and have had washes of black and brown, being watered down Life Color acrylics. Heavier washes on the springs with brown to simulate age & some oxidisation.


TO BE CONTINUED............